|
If you are tired of removing the AC compressor and struggling to remove your factory 60/78 amp Chrysler alternator, headlights that dim when you turn on the AC, engines that surge under boost with headlights and wipers turned on and loss of performance/engine stuttering when the AC cycles in your L-body, then you might want to consider the following Nippondenso alternator and charging harness upgrade.
Why? The nippon is more powerful, more reliable, smaller, and more easily serviced, also a lot more plentiful and cheaper in the salvage yard, easier to find in good working condition, uses the same accessory belt, and is soooo much easier to R&R if needed.
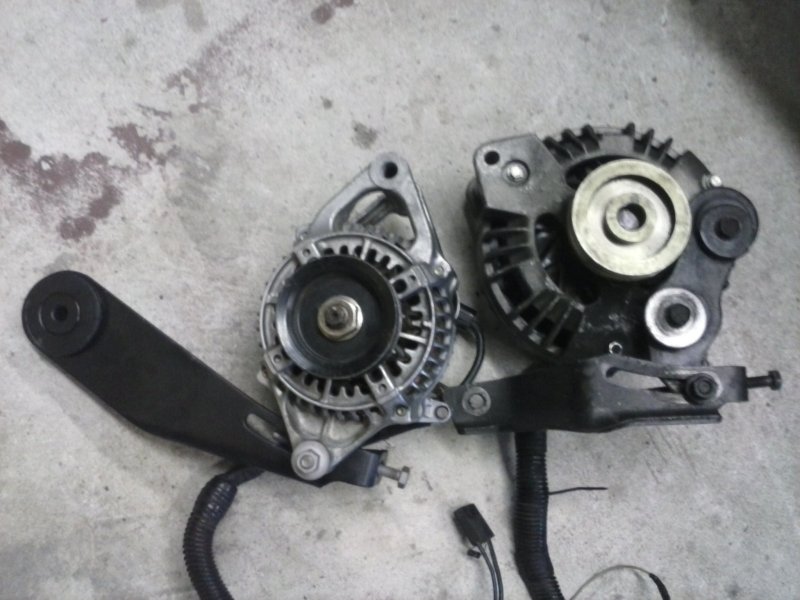
NipponDenso With Easy To Adjust Bracket (Left)
Cryco with not so easy to adjust bracket (Right)
In brief, all you need to do is source some parts from other Chrysler models and exchange them for your OEM L-body components. There is no cutting, fabrication, welding, or bending required for this upgrade. It will take about 1-2 hours to perform once you have all the needed parts.
Here is what you need to perform this upgrade:
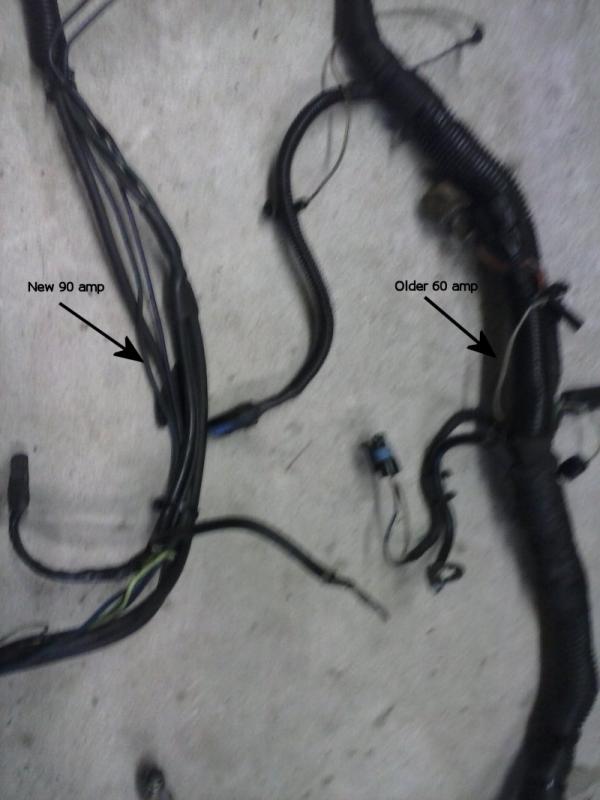
1 Nippondenso alternator from any Chrysler product from this period (87-92). They come in 90, 120 and 160 amp configurations. You need one that has the same pulley on it with the same number of grooves. Some will have a pulley with more grooves, those wont fit your L-body unless you swap the pulley using a press. The wider pulley will interfere with other drive belts. The first picture below show the difference in size as well as the different arrangement of the adjusting bracket. These alternators are plentiful in the salvage yard as well as over the parts counter.
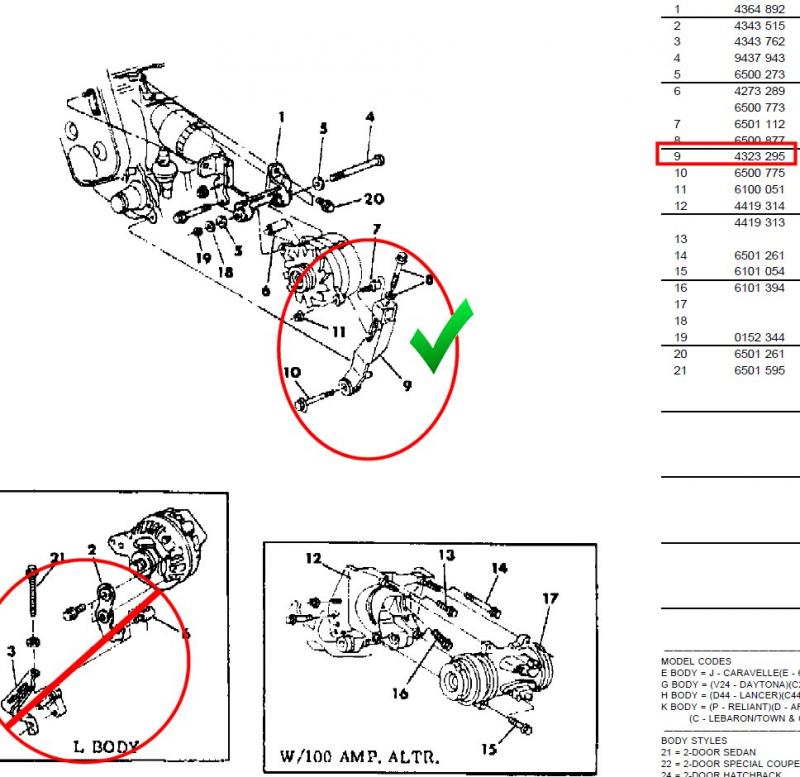
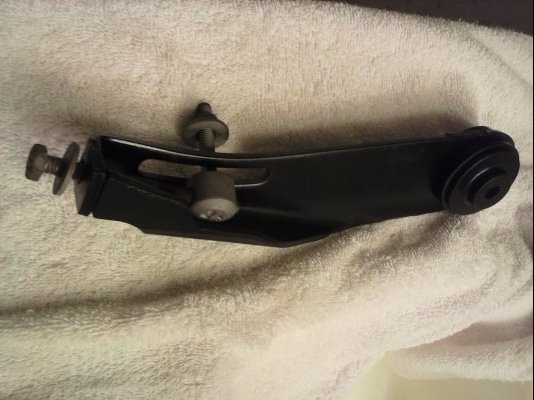
1 Non L-body alternator adjusting bracket Mopar# 4323 295. They are commonly found on anything built in the 86-89 range, I have found them most commonly on the Lancer, not so much on the Daytona. The second picture below shows this bracket, one that has been quickly refinished. They are not hard to find in the salvage yard.
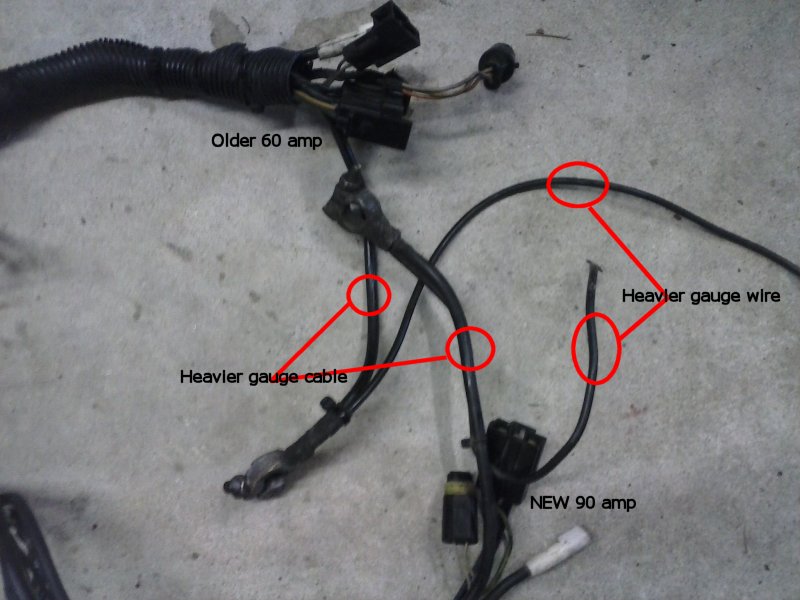
1 P-body/Shadow negative charge harness set. Just find about any Dodge Shadow and pull the front charge harness off of it...connectors and all. Choose one that is in the best possible condition and that the small sensor wires are still pliable on if you have several to choose from. All you are really after is the negative portion, the cables and wires that run from the back of the alternator to the battery negative terminal. Some of the wires are factory spliced and there is no need to cut them, just grab the whole thing and swap it over to the harness you already have. The third and fourth picture below shows the differences in the gauge of the wire. It is important to use the proper gauge wire. The 60/78 amp cable is not rated to carry a 90 amp load sustained. That is important!
The process to upgrade is very straight forward:
STEP 1: Get your parts ready, clean them up as needed
Begin by disconnecting the battery terminals and removing the AC compressor if you have one. It is also a good idea to confirm the charging system is already working w/a VOM across the battery terminals w/the car running. It should read 14+ volts. Of course if you are doing this upgrade because your 60/78 amp Chrysler unit has failed, this will not be necessary.
STEP 2: Remove the old alternator and front charge harness
STEP 3: Transfer the negative portion of the 90 amp charge harness over to your 60/78 amp harness. You might find it easier to cut and splice the two green field coil wires, solder them properly and use shrink wrap or a quality electrical tape (3M is good stuff). One wire will need to be removed from the plastic end connector and moved to the old harness connector. On the plastic end connector, use a small flat tool to remove the needed wire so that you can slip the same wire in from the 90 amp. Tape up the upgraded charge harness with old school electrical friction tape, self fusing 'Tommy Tape' or (last choice) good quality electrical tape.
STEP 4: Attach the charge harness to the new/used Nippondenso 90+ amp alternator
STEP 5: Attach the new adjusting strap to the alternator and finger tighten the pinch bolt, leave it just loose enough to be able to adjust it once installed. Run the adjusting bolt down to the point where it is in approximately the 1/2 way up/down position.
STEP 6: install the alternator, put the large pivot bolt in place and tighten it down.
STEP 7: Crawl under the car and attach the lower adjusting bracket bolt to the water pump housing, tighten it.
STEP 8: Install the accessory belt, adjust it and tighten the adjusting bracket pinch bolt.
STEP 9:(optional) Reinstal AC compressor if you still have one
STEP 10: Attach the negative battery cable to the battery and tighten
STEP 11: Start the car to test and confirm you have a charge, a VOM across the battery w/engine running should show 14+ volts.
|
